
Ever set up a router, only to find out you need two short Ethernet cables, and you’ve only got one long one? With a few tools and a little DIY geekery, you can start making all your own network cables.While buying bulk cable might not be for everybody, the ability to repair and split long cables is an essential geek skill. Keep reading to see the tools and techniques you’ll need to know to customize the cables for your home network.
Tools and Materials
 | Wire Cutters or Wire Strippers: For the self-explanatory task of cutting and stripping wires. They ordinarily retail for anywhere around $5 to $25 and can be found at any tool supply store or online. Wire Cutters (Amazon) |
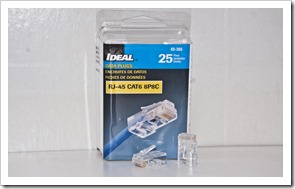 | RJ45 Data Plugs: These can be found at many computer stores, Radioshack, or some hardware or home supply stores in the electrical/wiring section. Some are labeled specifically Cat 6 or Cat 5e—buy specific ones if your network needs one or the other, or if you have a preference. (Author’s Note: I can’t seem to find any difference between one plug or another.) Data Plugs 25 Pack (Amazon) |
 | RJ45 Cable Crimping Tool: In order to make your cable’s data plug a permanent part of your new cable, you’ll need a set of these. These retail for varying prices, averaging around $10 to $15, depending on the brand or store you buy from. RJ45 Crimping Tool (Amazon) |
 | An Ordinary Cat5, Cat5e, or Cat6 cable: Assuming you’re going to turn one long cable into two (or three or four…) you can start with any working ethernet cable you have lying around. You can swap out existing data plugs this way, if you have long, expensive cables with broken clips. |
Author’s Note: All links are provided for the convenience of the reader. This isn’t an endorsement of the linked brands of plugs, cutters, or crimpers. They are merely an example of the correct tools.
Other Tools and Materials

This toolkit was available at common home supply store (like Home Depot or Lowes) and contained many of the tools used in this how to, including the crimper and a set of RJ45 data plugs. If you think you’ll get a lot of use out of the set, you might save a few dollars buying the bundle, and getting the whole set of tools, along with the helpful carrying case.

Networking cable can also be bought in bulk, in huge spools of hundreds or thousands of feet. A standard cable retails in an office supply store for around $20 per 6ft, and 1000 ft of Cat 5e cable costs about $80. With that price difference, you can network all your neighbors computers with bulk cable for less than the cost of retail cables for a half dozen computers inside your own home.
While very few of us will ever use 1000ft of networking cable, if you ever need excessively long cables in odd lengths, this is going to be one of your best bets.
Make Your Custom Networking Cable

Measure your cable to the length you desire, then add an inch or two, as you’ll end up losing a bit of cable during the process. The carpenter’s motto “measure twice, cut once” is very apt in this case, so make sure your cable is the correct length before cutting.

Your original cable is now in two pieces, Now you have to remove the shielding from the wiring inside the cable.

Cut away the outside shielding with a hobby knife, a wirestripping tool like the one shown above, or your wire cutters. Leave an inch to an inch and a half of wire if you’re doing this for the first time, as the wires can be frustrating to work with.

Untwist the wires from each other so you can work with them. Do not strip them. If there is any insulation inside your cable, do not pull it out. You can, however, cut away the excess from the end of your cable.

Orient the wires to this specific order. This can be easier for first-timers to do with longer wires, but you’ll shortly be trimming the excess away. Remember that this order is critical. If your cable has different colors (rare, except with very old cables), you’ll have to copy the order of the clip on the other end. This order, however, is the correct wiring for most ethernet cables.

Once your wires are in the correct order, trim the excess away. Your goal is to leave slightly less wire than will fit inside the RJ45 clip.

Bending the wires to stiffen them up can be helpful to keeping them in the right place. It can be frustrating to get the wires to stay in place and line up correctly with the pins, but it is far easier to do this than try and feed in the wires one at a time.
Hold the wires in place with your fingers and insert them all at once into the data plug, as shown, with the clip facing downward. Once they are seated in the pins, check to make sure none of them have changed position. If you go on to the next step and crimp your data plug without checking your wires, you may have to cut if off and do it again.

Once you’re sure your cable is wired correctly, with all wires seated to the appropriate pins, place your data plug into your crimping tool and give it a firm squeeze. If you have strong hands, don’t get overzealous and crush your data plug—it is only made of plastic, after all.

And there you have it, a complete ethernet cable, made from a segment of an existing cable. Repeat the steps to add as many data plugs and make as many cables as you need, in any length you need.

Cables can be as long (or as short!) as you can make them, and will work as well as any ordinary retail ethernet cable. Enjoy your new geek skill, and have fun wiring your network with your own custom-made cables.
This is my first time i visit here and I found so many interesting stuff in your blog especially it's discussion, thank you.
ReplyDeleteCat6 Cable